The Marrow 100% Map Guide
☆ Walkthrough in Progress: Bookmark for Updates!
★ Best Crest Builds | All Crest Locations
☆ Full Interactive Map of Pharloom!
★ Mask Shards | Spool Fragments | Abilities
☆ Boss Guides: Moorwing | Savage Beastfly | Widow
★ Tasks & Wishes: Berry Picking | The Lost Fleas

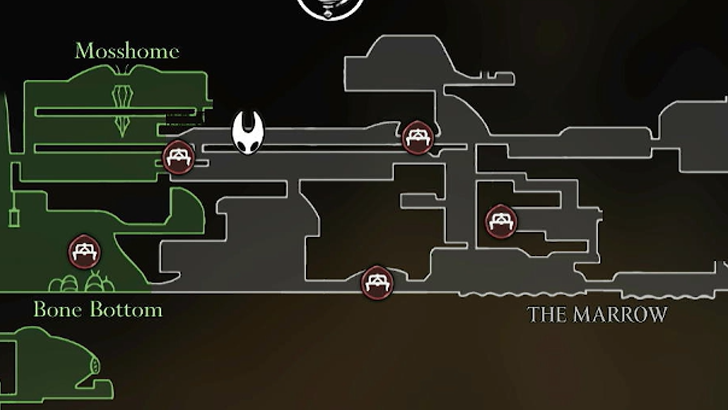
The Marrow is a location in Hollow Knight: Silksong. See a map of The Marrow, a list of points of interest including locations for bosses, wishes, tools, NPCs, items, and a guide to 100% the area here!
 Attention! Attention! |
This page is a work in progress! Sign in and select  under the page's title to be notified of any updates! under the page's title to be notified of any updates! |
|---|
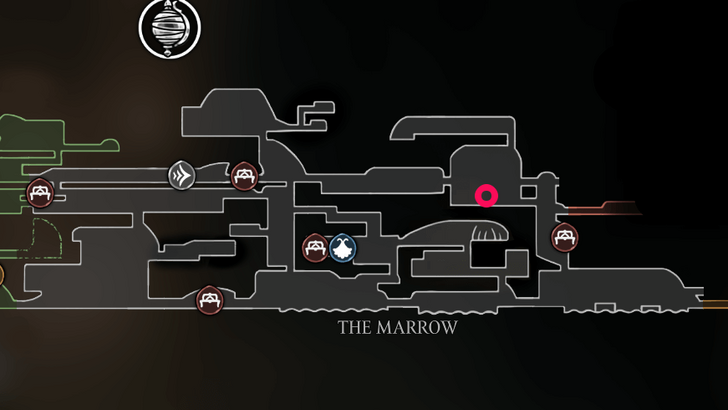
The Marrow Interactive Map
Full Map of The Marrow
Pharloom Full Map and All Locations
The Marrow 100% Guide
| The Marrow Points of Interest | |
|---|---|
| Bosses | Wishes |
| Tools | NPCs |
| Items | - |
The Marrow Bosses
| Boss | Location |
|---|---|
 Bell Beast Bell Beast
|
 The Bell Beast is the second main boss you will encounter in Hollow Knight: Silksong. The Bell Beast is located at The Marrow, stuck in a silk trap by the entrance. You will need to free it by obtaining the Silkspear upgrade in Mosshome. |
The Marrow Wishes
| Task | Description | Reward |
|---|---|---|
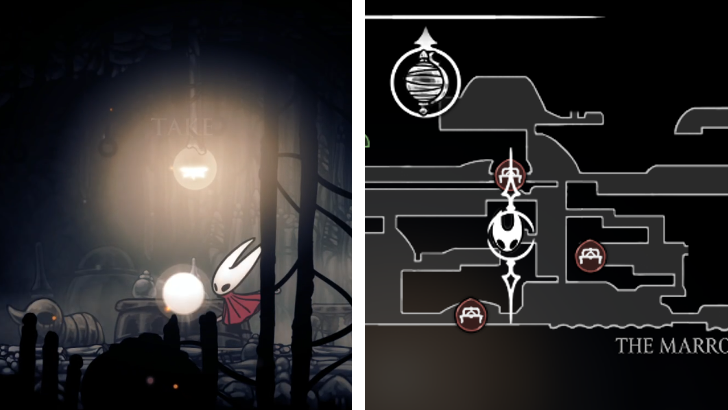
| The Lost Fleas |  Found at the center of The Marrow, one level above the area full of lava. You will notice signs depicting the icon when you're closeby. |
Caravan Travels to Greymoor
Flea Brew |
All Task Locations and Rewards
The Marrow Tools
| Tool | Slot and Effect | How to Get |
|---|---|---|
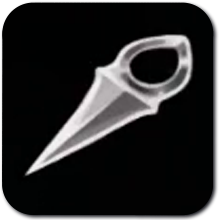 Straight Pin Straight Pin
|
Slot: Red Light throwing tool, designed for rapid attacks. |
 Can be picked up on a table above Grindle's cell. |
 Compass Compass
|
Slot: Yellow Intricate tracking device, carved from shell. When equipped, the bearer's location will be marked on their map. |
 Can be bought from Shakra for 70 Rosaries. |
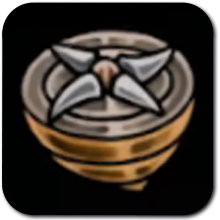
 Shard Pendant Shard Pendant
|
Slot: Yellow Crude trinket worn by collectors and crafters. Allows one to collect more shell shards from defeated creatures. |
 Can be found inside a room found at the long Vertical drop in the middle of the The Marrow. |
The Marrow NPCs
| NPC | Location |
|---|---|
| Shakra | 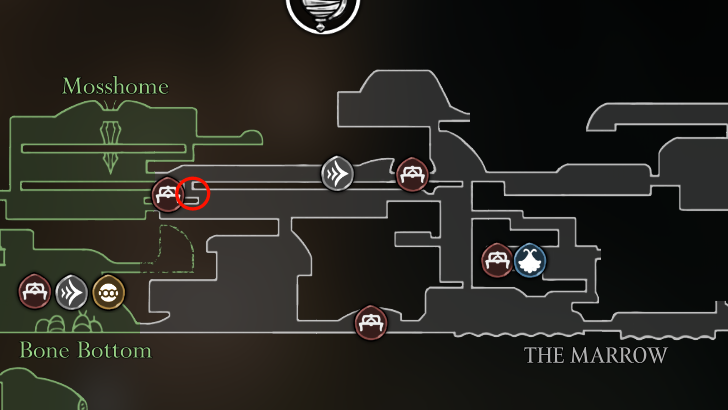 In The Marrow area, Shakra can be located at the top left section near Mosshome. This is where Shakra is first encountered, and where players can get the first two maps in the game. |
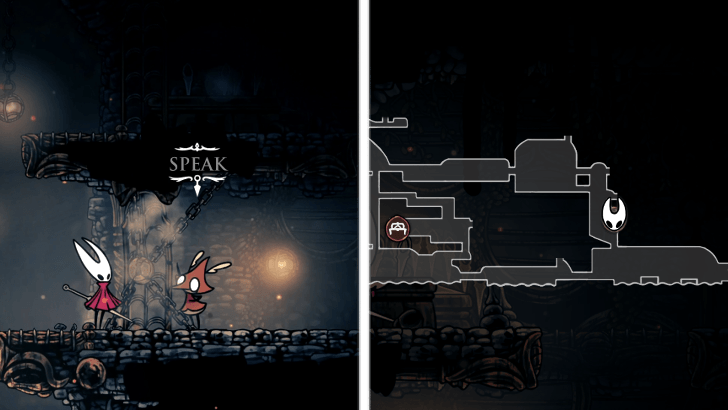
| Grindle | 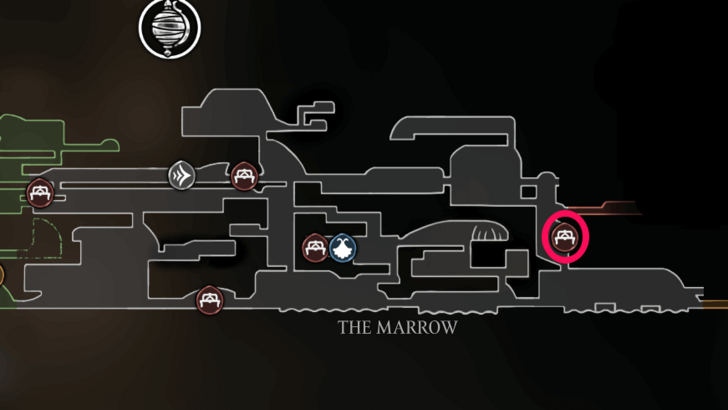 Found in a prison area at the eastern side of The Marrow. Break the entrance to Grindle's cell in order to free them. |
| Fleamaster Mooshka | 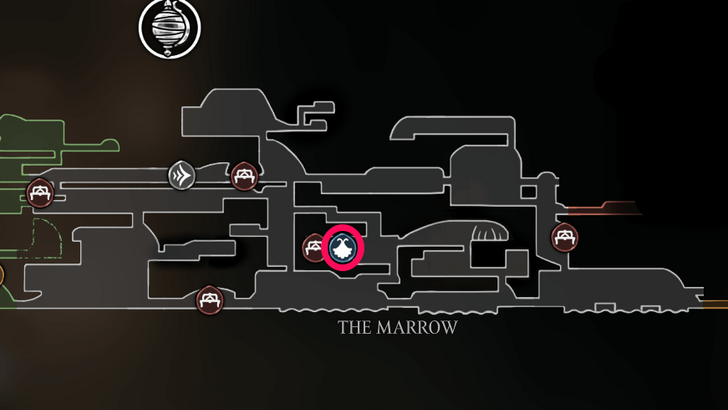 Three NPCs called the Flea Caravan can be found at the central part of The Marrow, above the section with lava. You will need to platform to get up here. |
| Grishkin | |
| Varga |
The Marrow Items
Shakra Shop Items
| Item | Location |
|---|---|
 Mosslands Map Mosslands Map
|
Shop Price: 40 Rosaries Description: These overgrown caves offer little challenge to a skilled warrior. A place for reflection, perhaps. |
 The Marrow Map The Marrow Map
|
Shop Price: 50 Rosaries Description: Crumbling roads built upon the shells of ancient bugs. All of Pharloom rests upon these fragile foundations. |
 Quill Quill
|
Shop Price: 50 Rosaries Description: With this quill, you can add any new areas you discover to the maps that you own. We pluck these quills from Golpeni hunted by my tribe. Their hollowed shafts make the perfect charting tool. |
 Compass Compass
|
Shop Price: 70 Rosaries Description: Track your location throughout these winding lands with a bone compass. Each member of our tribe can craft them. I would pass you mine, for a small price. |
 Bench Pins Bench Pins
|
Shop Price: 60 Rosaries Description: When travelling in unfriendly lands, it is important to remember safe places to camp. These pins will mark benches and other rest spots on your map. |
 Shell Marker Shell Marker
|
Shop Price: 40 Rosaries Description: You can use these to mark places of importance or reminders on your map. These markers I have modelled after the sheen of my own shell. Perhaps you will think of me when you use them. |
Shakra Locations and Item List
Item Pickups
| Item | Location |
|---|---|
 Silk Heart Silk Heart
|
A Silk Heart is obtained after defeating the boss Bell Beast, at the top left part of The Marrow. |
 Craftmetal Craftmetal
|
 Found in a hidden area blocked off by a glowing piece of explosive rock lodged into the wall. Strike the glowing rock to open an entrance. |
Hollow Knight: Silksong Related Guides

Pharloom Full Map and All Locations
All Locations in Silksong
| Pharloom Locations | ||
|---|---|---|
| Moss Grotto | The Marrow | Deep Docks |
| Far Fields | Hunter's March | Greymoor |
| Wormways | Bellhart | Shellwood |
| Blasted Steps | Grand Gate | Underworks |
| Choral Chambers | The Slab | Mount Fay |
| Whiteward | Wisp Thicket | Cogwork Core |
| Whispering Vaults | Memorium | Putrified Ducts |
| Bilewater | Weavenest Atla | Sinner's Road |
| High Halls | The Cradle | Sands of Karak |
Comment
Author

The Marrow 100% Map Guide
Rankings
- We could not find the message board you were looking for.
Gaming News

Popular Games

Genshin Impact Walkthrough & Guides Wiki
Hollow Knight: Silksong Walkthrough & Guides Wiki
Umamusume: Pretty Derby Walkthrough & Guides Wiki
Borderlands 4 Walkthrough & Guides Wiki
Wuthering Waves Walkthrough & Guides Wiki
Honkai: Star Rail Walkthrough & Guides Wiki
Pokemon TCG Pocket (PTCGP) Strategies & Guides Wiki
Pokemon Scarlet and Violet (SV) Walkthrough & Guides Wiki
Zenless Zone Zero Walkthrough & Guides Wiki
Clair Obscur: Expedition 33 Walkthrough & Guides Wiki


Recommended Games
Once Human Walkthrough & Guides Wiki
Fire Emblem Heroes (FEH) Walkthrough & Guides Wiki
Yu-Gi-Oh! Master Duel Walkthrough & Guides Wiki
Persona 3 Reload Walkthrough & Guides Wiki
Black Myth: Wukong Walkthrough & Guides Wiki
The Legend of Zelda: Tears of the Kingdom Walkthrough & Guides Wiki
Super Smash Bros. Ultimate Walkthrough & Guides Wiki
Monster Hunter World Walkthrough & Guides Wiki
Diablo 4: Vessel of Hatred Walkthrough & Guides Wiki
Elden Ring Shadow of the Erdtree Walkthrough & Guides Wiki


All rights reserved
© 2025 Team Cherry
The copyrights of videos of games used in our content and other intellectual property rights belong to the provider of the game.
The contents we provide on this site were created personally by members of the Game8 editorial department.
We refuse the right to reuse or repost content taken without our permission such as data or images to other sites.