Best Relics
★ Trending: Puzzles | Codes | Jeljin | NG+
☆ Starting out? Check our Beginner's Guide
┗ Combat | Builds | Weapons | Tier List
★ Walkthrough | Good Deeds | Mysteries
┗ Timeloops | Vaults | NPCs | Enemies
☆ Missables | Game Length | Trophies
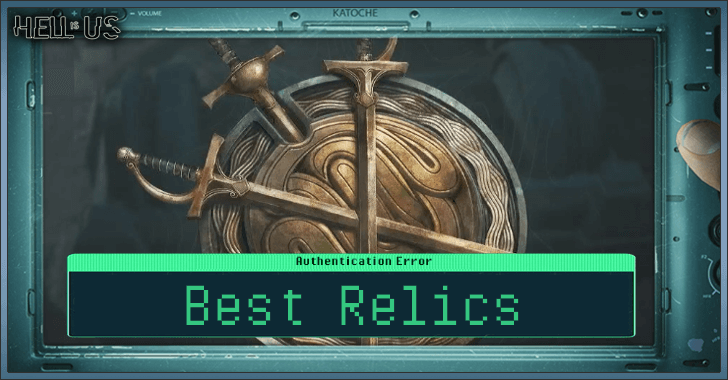
This is a list of all the best Relics you can get and equip in Hell is Us. Find the best relics in the game, as well as our rating for each of the relics.
 Attention! Attention! |
This list is based on early impressions of the game and is subject to change as we continue testing other relics. Sign in and select  under the page's title to be notified of any updates! under the page's title to be notified of any updates! |
|---|
| Best Relics | All Relics |
List of Contents
Best Relics
Active Relics
| Rank | Active Relic |
|---|---|
| 1 | Aster’s Band of Domination |
| 2 | Blessed Hand of Sethyris |
| 3 | Heart of the Griffon |
| 4 | Orison of Valour |
| 5 | Wisdom of the Griffon |
| 6 | Memoria of the Phol |
1. Aster’s Band of Domination
 Aster’s Band of Domination Aster’s Band of Domination
|
|||
| Type | Active | ||
|---|---|---|---|
| Cooldown | 3 mins | ||
| Stun Enemies | Duration: 10 seconds | ||
| Radius | 10 meters | ||
| Effect | |||
| Subjugate the enemy, stunning all nearby. | |||
Aster's Band of Domination allows you to stun multiple enemies with a single use. You can partner this with AoE attacks to clear groups of enemies fast while they're stunned. It's also useful when you have to heal, just stun the enemy and restore your lost health.
2. Blessed Hand of Sethyris
 Blessed Hand of Sethyris Blessed Hand of Sethyris
|
|||
| Type | Active | ||
|---|---|---|---|
| Cooldown | 9 mins | ||
| Melee Damage | +100%
Duration: 300 seconds |
||
| Effect | |||
| Your weapons are guided by Sethyris, increasing the damage of regular attacks. | |||
The Blessed Hand of Sethyris doubles your melee damage which means your regular attack combos will be much more powerful. It also lasts for a long time which means the buff is guaranteed to stay for the duration of most fights in the game.
3. Heart of the Griffon
 Heart of the Griffon Heart of the Griffon
|
|||
| Type | Active | ||
|---|---|---|---|
| Cooldown | 6 mins | ||
| Effect | |||
| Fully restores your Health, Stamina and Lymbic Energy | |||
The Heart of the Griffon is basically a second life since it fully restores your HP, Stamina, and Lymbic Energy. It can come in clutch for situations where you're near death and can fully turn a fight around.
4. Orison of Valour
 Orison of Valour Orison of Valour
|
|||
| Type | Active | ||
|---|---|---|---|
| Cooldown | 9 mins | ||
| Effect | |||
| Become unfettered by the exertion of combat, removing Stamina costs for all actions. | |||
Orison of Valour eliminates Stamina consumption for some time which allows you to combo freely while its active. Pair this up with Passive Relics that increase combo damage and you'll be bursting enemies down.
However, attack speed and attack animation are also key factors so make sure to use weapons that have high attack speed with this Relic.
5. Wisdom of the Griffon
 Wisdom of the Griffon Wisdom of the Griffon
|
|||
| Type | Active | ||
|---|---|---|---|
| Cooldown | 6 mins | ||
| Effect | |||
| Find your awash in potential, passively restoring Lymbic Energy. | |||
Wisdom of the Griffon regens Lymbic Energy consistently for some time. This can be useful if you want to keep using your abilities for the fight and can help you sustain the energy consumption of those abilities.
6. Memoria of the Phol
 Memoria of the Phol Memoria of the Phol
|
|||
| Type | Active | ||
|---|---|---|---|
| Cooldown | 9 mins | ||
| Effect | |||
| Your weapons resonate with the frequencies of past battles, increasing their experience gained. | |||
Memoria of the Phol increases Weapon EXP gain and when paired with the Entropic Enigma relic, you can level up your weapons much more quickly. It's great for players that dont rely on relics to get a nice EXP bonus.
Passive Relics
| Rank | Passive Relic |
|---|---|
| 1 | Mark of the Betrayed |
| 2 | The Blood Queen's Phalange |
| 3 | The Crucible of Fire |
| 4 | The Omen of Oblivion |
| 5 | The Entropic Enigma |
1. Mark of the Betrayed
 Mark of the Betrayed Mark of the Betrayed
|
|||
| Type | Passive | ||
|---|---|---|---|
| Damage Bonus After Parry | +200%
Duration: 10 seconds |
||
| Effect | |||
| Retaliate with tremendous fury, increasing damage dealt after parrying. | |||
The Mark of the Betrayed is a great relic if you like to parry enemies. It gives you a huge damage boost after parrying which strengthens the attacks you do after and while they're stunned from the parry. The only requirement of this relic is that you have to parry enemies, which may be hard to do for players who aren't used to the mechanic.
2. The Blood Queen's Phalange
 The Blood Queen’s Phalange The Blood Queen’s Phalange
|
|||
| Type | Passive | ||
|---|---|---|---|
| Melee Damage | +25%
Duration: 30 seconds |
||
| Effect | |||
| Grow bolder in your victories, increasing damage dealt for each enemy vanquished. | |||
The Blood Queen's Phalange is great for fights with multiple enemies for the melee damage buff. This is mostly achievable in Haze fights but can also be utilized in fights with groups of Hollow Walkers.
3. The Crucible of Fire
 The Crucible of Fire The Crucible of Fire
|
|||
| Type | Passive | ||
|---|---|---|---|
| Melee Damage | +50% | ||
| Protection Penalty | -25% | ||
| Effect | |||
| A reckless rage grips you, increasing melee damage dealt and taken. | |||
The Crucible of Fire is a double edged sword which increases your DMG at the expense of you taking more damage. It's basically a great relic for glass cannon builds. You can pair this up with other Melee Damage boosting relics and stack it for even more damage with each attack.
4. The Omen of Oblivion
 The Omen of Oblivion The Omen of Oblivion
|
|||
| Type | Passive | ||
|---|---|---|---|
| Combo Capper Damage | +100% | ||
| Effect | |||
| A sense of finality seizes you, increasing the damage and power of Combo Capper attacks. | |||
The Omen of Oblivion is great for regular attack focused builds and pairs nicely with the Orison of Valour relic, which eliminates Stamina consumption for a short time. This can allow you to burst down enemies with your attacks.
5. The Entropic Enigma
 The Entropic Enigma The Entropic Enigma
|
|||
| Type | Passive | ||
|---|---|---|---|
| Experience Bonus | +25% | ||
| Effect | |||
| Attune your weapons' resonance, increasing their experience gained. | |||
The Entropic Enigma increases EXP gain for your weapons and pairs nicely with the Memoria of the Phol relic which increases EXP gain also. This is great if you want to level up your weapons quickly in a short time.
Hell is Us Related Guides

Best Guides for Beginners
 Beginner's Guide
 Combat Guide
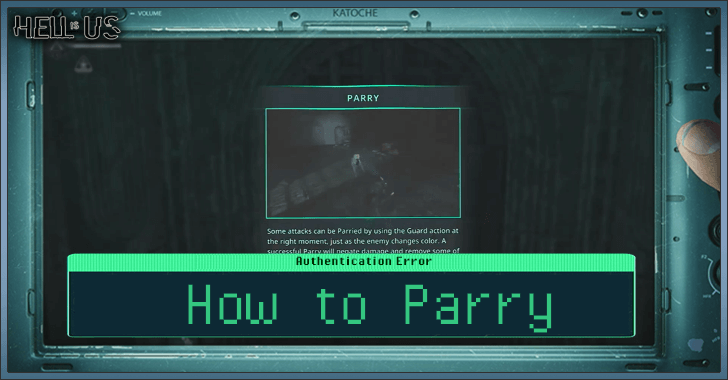 How To Parry
 How to Riposte
 How to Fast Travel
 How to Heal
 Healing Pulse Explained
 Weapon Upgrades Explained
 Map Guide
 Lymbic Spheres Explained
 Status Effects Explained
 Best Weapon XP Farming Guide
 Lymbic Energy Explained
Meta Guides
 Best Builds Best Builds |
 Best Defensive Gear Best Defensive Gear |
Best Relics |
 Best Glyphs Best Glyphs |
 Best Drone Modules Best Drone Modules |
 Best Weapons Tier List Best Weapons Tier List |
End Game Guides
 All Missables All Missables |
 Post Game Guide Post Game Guide |
 Trophy Guide Trophy Guide |
 All Timeloop and Guardian Locations All Timeloop and Guardian Locations |
 Ending Explained Ending Explained |
 Legend of the Phol Guide Legend of the Phol Guide |
Game Information
 How Long to Beat How Long to Beat |
 Demo Details Demo Details |
 All Console and PC Controls All Console and PC Controls |
 Difficulty Settings Explained Difficulty Settings Explained |
 Best Settings Best Settings |
- |
Comment
Author

Best Relics
Rankings
- We could not find the message board you were looking for.
Gaming News


Popular Games

Genshin Impact Walkthrough & Guides Wiki
Hollow Knight: Silksong Walkthrough & Guides Wiki
Umamusume: Pretty Derby Walkthrough & Guides Wiki
Borderlands 4 Walkthrough & Guides Wiki
Wuthering Waves Walkthrough & Guides Wiki
Honkai: Star Rail Walkthrough & Guides Wiki
Pokemon TCG Pocket (PTCGP) Strategies & Guides Wiki
Pokemon Scarlet and Violet (SV) Walkthrough & Guides Wiki
Zenless Zone Zero Walkthrough & Guides Wiki
Clair Obscur: Expedition 33 Walkthrough & Guides Wiki


Recommended Games
Once Human Walkthrough & Guides Wiki
Fire Emblem Heroes (FEH) Walkthrough & Guides Wiki
Yu-Gi-Oh! Master Duel Walkthrough & Guides Wiki
Persona 3 Reload Walkthrough & Guides Wiki
Black Myth: Wukong Walkthrough & Guides Wiki
The Legend of Zelda: Tears of the Kingdom Walkthrough & Guides Wiki
Super Smash Bros. Ultimate Walkthrough & Guides Wiki
Monster Hunter World Walkthrough & Guides Wiki
Diablo 4: Vessel of Hatred Walkthrough & Guides Wiki
Elden Ring Shadow of the Erdtree Walkthrough & Guides Wiki


All rights reserved
©2025 – Nacon
The copyrights of videos of games used in our content and other intellectual property rights belong to the provider of the game.
The contents we provide on this site were created personally by members of the Game8 editorial department.
We refuse the right to reuse or repost content taken without our permission such as data or images to other sites.