Super Creek (Murmuring Stream) Build Guide and Character Info
★ Best Characters | Best Support | Best Skills
┗ New Character: Seiun Sky | Hishi Amazon
┗ New Cards: Bamboo Memory | Shinko Windy
★ Event Choice Checker
★ Support Comparison Tool
★ Friend ID Sharing Board
This is a build guide for Super Creek (Murmuring Stream) in Umamusume: Pretty Derby. Find out how to build Super Creek, her preferred tracks, distances, and style, as well as her basic character information, here!
| Super Creek Related Guides | |
|---|---|
|
|
|
List of Contents
Super Creek (Murmuring Stream) Character Info
Super Creek (Murmuring Stream) Stats
| Super Creek (Murmuring Stream) | |||||||||||||||||||
|---|---|---|---|---|---|---|---|---|---|---|---|---|---|---|---|---|---|---|---|

|
|||||||||||||||||||
| Overall | Ease | T. Trials | CM | ||||||||||||||||
|
|
|
|
| ||||||||||||||||
| Track Aptitude | |||||||||||||||||||
| Turf: A | Dirt: G | ||||||||||||||||||
| Distance Aptitude | |||||||||||||||||||
| Sprint: G | Mile: G | Med: A | Long: A | ||||||||||||||||
| Pace Aptitude | |||||||||||||||||||
| Front: D | Pace: A | Late: B | End: G | ||||||||||||||||
| Stat Growth | |||||||||||||||||||
| SPD: 0% | STA: 10% | POW: 0% | GUT: 0% | WIT: 20% | |||||||||||||||
Super Creek (Murmuring Stream) Unique Skill
|
(2★) |
Moderately recover endurance when well-positioned mid-race. |
|---|---|
|
(3★+) |
Recover endurance when well-positioned mid-race. |
Super Creek (Murmuring Stream) Innate Skills
| All Innate Skills |
|---|
Super Creek (Murmuring Stream) Potential Skills
| Skill Per Potential Level |
|---|
| Potential 2: Potential 3: Potential 4: Potential 5: |
Super Creek (Murmuring Stream) Career Training Tips
| Training Tips |
|---|
|
|
Run Her as a Pace Chaser
Super Creek has an A rank on her Pace Chaser aptitude, so it is best to use this running style for her during her career and other events. She also has some debuffing skills like Disorient and Dazzling Disorientation that only activates in this running style.
Max Out Her Potential When Able
To increase the amount of skills you immediately have access to on Super Creek, it is recommended to max out her Potential level for her Swinging Maestro skill. However, if you do not have the Monies or materials to do so, try to unlock Potential Level 2 for her Ramp Up skill.
Super Creek (Murmuring Stream) Champions Meeting Build
| Jump to a Build! | |
|---|---|
| Champions Meeting | General Career |
Champions Meeting Stats
| 1100+ | 1050+ | 600+ | 400+ | 400+ |
We recommend these stats for Super Creek as she will primarily run as a Pace Chaser and will need Stamina both to keep her pace and to account for enemy debuffers. Having up to two Gold Recovery skills will help you survive debuffs during the race.
It's important to note that you will need to upgrade her Long aptitude to A to make using her in the Gemini Cup feasible. You can do this using Legacies and Sparks.
Skills and Support Cards
 Sweep Tosho (Lamplit Training of a Witch-to-be)
 Special Week (The Setting Sun And Rising Stars)
 Kitasan Black (Fire at My Heels)
 Mayano Top Gun (Cute + Cute = ?)
 Mejiro McQueen (Your Team Ace)
 Zenno Rob Roy (The Perfect Book for You)
We recommend these skills for Super Creek as these can help her get the Speed and Stamina that she needs for the race. This also takes into account the possible debuffers that she will encounter during the race, which can be offset by the two Gold Recovery skills.
As Super Creek will be a Pace Chaser, taking Unique skills like Red Shift/LP1211-M and Triumphant Pulse will help you close out races.
Gemini Cup Champions Meeting Guide
Super Creek (Murmuring Stream) Build
| Jump to a Build! | |
|---|---|
| Champions Meeting | General Career |
Recommended Stats
| 900 | 900 | 700 | 300 | 400 |
Super Creek is a Pace Chaser in Medium to Long races, so having high Speed and Stamina is needed. Increase her Power as well to help with her overtaking and acceleration in the late race.
It is important to note that if you cannot reach the stats recommended above, you can instead aim for a similar stat distribution. You can then compensate for the missing stats using skills. Additionally, if you are only planning on clearing a career run with Super Creek then you can aim for lower stat numbers, as the stats above are a baseline for Team Trials.
Recommended Support Cards
 Vodka (Wild Rider)
 Nishino Flower (Even the Littlest Bud)
 Fine Motion (Wave of Gratitude)
Super Creek's recommended deck includes 3 Speed, 1 Stamina, 1 Power, and 1 Wit card, although you can swap the Wit card for Stamina if you need Stamina. This shouldn't be much of a problem, since she has +20% Wit growth to make up for it.
These cards will help Super Creek level her needed Stats (especially with Rainbow/Friendship Training), as well as provide some needed skills like Gourmand and Homestretch Haste.
Alternate SR Support Cards
| Alternate Cards | ||
|---|---|---|
 Agnes Tachyon (Experimental Studies on Subject A) Agnes Tachyon (Experimental Studies on Subject A) Rarity: SR Type: Wit Great Medium speed skills and debuffs |
 Manhattan Cafe (My Solo Drawn to Raindrop Drums) Manhattan Cafe (My Solo Drawn to Raindrop Drums) Rarity: SR Type: Stamina Long skills and decent green skills |
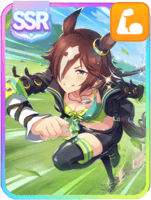
 Hishi Amazon (Reach to the Top!) Hishi Amazon (Reach to the Top!) Rarity: SR Type: Power Good for Pace Chasers and End Closers |
 Marvelous Sunday (A Marvelous ☆ Plan) Marvelous Sunday (A Marvelous ☆ Plan) Rarity: SR Type: Wit General-purpose speed skills and debuffs |
||
If you do not have the cards from the recommended deck, you can replace them with a similar stat card that provides skills that Super Creek needs. These can be SSR cards, or even SR cards. Above are some of the SR cards that you can use in place of SSR Support cards.
Recommended Legacy Sparks
| Recommended | |
|---|---|
| 9★ Stamina 9★ Power |
|
| 3★ Pace Chaser 3★ Late Surger 3★ Medium 3★ Long |
For Legacy Sparks, we recommend trying to find Stamina and Power sparks, as she will need it for her Medium and Long races. Additionally, try to get either Medium or Long sparks, since her career has an equal mix of both.
For running style sparks, try to go for either Pace Shaser so that it can be pushed to S, or Late Surger to upgrade it to A.
You can use either your own Veterans, or borrow the ones from your friends. If you do not have Veterans with full sparks, you can go with whatever you have access to.
Legacy Compatibility
| Great | |
|---|---|
| Good |
When picking Legacies, try to select compatible legacies, as they increase the chance of inheriting additional sparks during the Inheritance events. This is not required, but is highly recommended.
If you do not have access to fully compatible legacies, it is enough to ensure that you have at least good compatibility with your selected legacies.
Recommended Skills
| Recommended Skills | ||
|---|---|---|
 Straightaway Recovery Straightaway Recovery
|
 Gourmand Gourmand
|
 Go with the Flow Go with the Flow
|
 Professor of Curvature Professor of Curvature
|
 Straightaway Acceleration Straightaway Acceleration
|
 Homestretch Haste Homestretch Haste
|
Super Creek is a Pace Chaser (and possibly a Late Surger), so she will need speed skills to win her races, as well as stamina skills to help with the Long races. Go with the Flow is a strong maneuvering skill, while Homestretch Haste and Straightaway Acceleration will provide speed in the final spurt.
Gourmand and Straightaway Recovery are great skills that can help with stamina recovery, although you can still get Swinging Maestro if you have Super Creek's potential upgraded.
If you cannot get the recommended skills, you can replace them with similar skills that you have access to. You will just need to make sure that Super Creek can activate said skills in a race.
Super Creek (Murmuring Stream) Events
A Self-Satisfying Wish
| Choice | Outcome |
|---|---|
| Choice 1 | ・ 20 Power |
| Choice 2 | ・ 20 Stamina |
Fill Life with Love
| Choice | Outcome |
|---|---|
| Choice 1 |
・ 10 Speed ・ 10 Stamina |
| Choice 2 | ・ 20 Wit |
Patience Is Key
| Choice | Outcome |
|---|---|
| Choice 1 |
・ 20 Guts ・ Hot Topic (Random) |
| Choice 2 |
・ 10 Stamina ・ 10 Power ・ Hot Topic (Random) |
Dispel Your Anxieties
| Choice | Outcome |
|---|---|
| Choice 1 | ・ 10 Power |
| Choice 2 |
・ 5 Speed ・ 5 Guts |
Is Relaxing Being Spoiled?
| Choice | Outcome |
|---|---|
|
Choice 1
(I have clear and detailed plans.) |
・ 10 Stamina |
|
Choice 2
(I wouldn't call myself complacent...) |
・ 10 Wit |
Let's Share
| Choice | Outcome |
|---|---|
| Choice 1 | ・ 10 Stamina |
| Choice 2 | ・ 10 Speed |
| Choice 3 | ・ 10 Power |
Rough Massage!
| Choice | Outcome |
|---|---|
|
Choice 1
(Massages are best received after warming up your body.) |
・ 10 Guts |
|
Choice 2
(Sure, I don't mind.) |
・ 5 Speed ・ 5 Wit |
Stargazing is Better Together
| Choice | Outcome |
|---|---|
| Choice 1 |
・ 5 Power ・ 5 Guts |
| Choice 2 | ・ 10 Stamina |
A Dangerous Treat
| Choice | Outcome |
|---|---|
|
Choice 1
(You've got a stronger stomach than I have.) |
・ 10 Guts ・ 15 Skill Pts |
|
Choice 2
(Well, her driving is nothing to sneeze at, I'll tell you that...) |
・ Corner Recovery ◯ Skill Hint |
Dance Lesson (Super Creek)
| Choice | Outcome |
|---|---|
|
Choice 1
(All right, let's do it!) |
・ 10 Stamina |
|
Choice 2
(I'd hate to interrupt your practice...) |
・ 10 Speed |
Find the Lost Child!
| Choice | Outcome |
|---|---|
|
Choice 1
(Let's split up and look for her.) |
・ -10 Energy ・ 10 Stamina ・ 10 Power |
|
Choice 2
(Let's request a lost-person announcement on the PA system.) |
・ 10 Wit |
For My Friends
| Choice | Outcome |
|---|---|
|
Choice 1
(You're asking for the impossible...) |
・ 10 Energy ・ 5 Skill Pts |
|
Choice 2
(Success)
(You can do it, Creek!) |
・ 30 Energy ・ 10 Skill Pts |
|
Choice 2
(Fail)
(You can do it, Creek!) |
・ 30 Energy ・ -5 Speed ・ 5 Power ・ 10 Skill Pts ・ Slow Metabolism |
One-Day Experience ☆ Ceramics Class
| Choice | Outcome |
|---|---|
|
Choice 1
(A teacup seems handy.) |
・ 5 Speed ・ 5 Wit |
|
Choice 2
(A vase would make for great interior decoration.) |
・ 10 Stamina |
Sweet Nighttime Temptation
| Choice | Outcome |
|---|---|
|
Choice 1
(I think it's fine.) |
・ 30 Energy ・ 10 Speed ・ 10 Skill Pts ・ Slow Metabolism (Rare) |
|
Choice 2
(Don't give in to the temptation...) |
・ 10 Energy ・ 5 Speed ・ 5 Skill Pts |
At Summer Camp (Year 2) (Super Creek)
| Choice | Outcome |
|---|---|
|
Choice 1
(Let's hold a sumo-wrestling tournament.) |
・ 10 Power |
|
Choice 2
(Let's go on a ghost hunt.) |
・ 10 Guts |
New Year's Resolutions (Super Creek)
| Choice | Outcome |
|---|---|
|
Choice 1
(I'd like a homemade meal.) |
・ 10 Stamina |
|
Choice 2
(I don't need anything!) |
・ 20 Energy |
|
Choice 3
(Give me lots of praise.) |
・ 20 Skill Pts |
New Year's Shrine Visit (Super Creek)
| Choice | Outcome |
|---|---|
|
Choice 1
(A saintly awakening.) |
・ 30 Energy |
|
Choice 2
(A burst of vigor.) |
・ 5 All Stats |
|
Choice 3
(A domestic upgrade.) |
・ 35 Skill Pts |
Don't Over Do it! (Super Creek)
| Choice | Outcome |
|---|---|
| Choice 1 |
・ 10 Energy ・ -2 Mood ・ Last trained stat and two other random stat -10 ・ Practice Poor (random) |
| Choice 2 (Success) | ・ Practice Perfect ◯ |
| Choice 2 (Fail) |
・ -3 Mood ・ 3 Random stat -10 ・ Practice Poor |
Extra Training (Super Creek)
| Choice | Outcome |
|---|---|
|
Choice 1
(I'll join you two.) |
・ -5 Energy ・ Last trained stat +5 ・ 5 Friendship with Director |
|
Choice 2
(You can't see where you're running in the dark...) |
・ 5 Energy |
Get Well Soon! (Super Creek)
| Choice | Outcome |
|---|---|
| Choice 1 |
・ -1 Mood ・ Last trained stat -5 ・ Practice Poor (random) |
| Choice 2 (Success) | ・ Practice Perfect ◯ |
| Choice 2 (Fail) |
・ -1 Mood ・ Last trained stat -10 ・ Practice Poor (random) |
Defeat (G1) (Super Creek)
| Choice | Outcome |
|---|---|
| Choice 1 |
・ -25 Energy ・ 25 Skill Pts ・ Random Stat +4 |
| Choice 2 (Success) |
・ -15 Energy ・ 25 Skill Pts ・ Random Stat +4 |
| Choice 2 (Fail) |
・ -35 Energy ・ 25 Skill Pts ・ Random Stat +4 |
Defeat (G2) (Super Creek)
| Choice | Outcome |
|---|---|
| Choice 1 |
・ -25 Energy ・ 20 Skill Pts ・ Random Stat +3 |
| Choice 2 (Fail) |
・ -35 Energy ・ 25 Skill Pts ・ Random Stat +4 |
| Choice 2 (Success) |
・ -15 Energy ・ 20 Skill Pts ・ Random Stat +3 |
Defeat (G3) (Super Creek)
| Choice | Outcome |
|---|---|
| Choice 1 |
・ -25 Energy ・ 20 Skill Pts ・ Random Stat +3 |
| Choice 2 (Success) |
・ -15 Energy ・ 20 Skill Pts ・ Random Stat +3 |
| Choice 2 (Fail) |
・ -35 Energy ・ 20 Skill Pts ・ Random Stat +3 |
Defeat (OP and Pre-OP) (Super Creek)
| Choice | Outcome |
|---|---|
| Choice 1 |
・ -25 Energy ・ 10 Skill Pts |
| Choice 2 (Success) |
・ -15 Energy ・ 10 Skill Pts |
| Choice 2 (Fail) |
・ -35 Energy ・ 10 Skill Pts |
Solid Showing (G1) (Super Creek)
| Choice | Outcome |
|---|---|
| Choice 1 |
・ -20 Energy ・ 45 Skill Pts ・ Random Stat +8 |
| Choice 2 (Success) |
・ -10 Energy ・ 45 Skill Pts ・ Random Stat +8 |
| Choice 2 (Fail) |
・ -30 Energy ・ 45 Skill Pts ・ Random Stat +8 |
Solid Showing (G2) (Super Creek)
| Choice | Outcome |
|---|---|
| Choice 1 |
・ -20 Energy ・ 35 Skill Pts ・ Random Stat +5 |
| Choice 2 (Success) |
・ -10 Energy ・ 35 Skill Pts ・ Random Stat +5 |
| Choice 2 (Fail) |
・ -30 Energy ・ 35 Skill Pts ・ Random Stat +5 |
Solid Showing (G3) (Super Creek)
| Choice | Outcome |
|---|---|
| Choice 1 |
・ -20 Energy ・ 35 Skill Pts ・ Random Stat +5 |
| Choice 2 (Success) |
・ -10 Energy ・ 35 Skill Pts ・ Random Stat +5 |
| Choice 2 (Fail) |
・ -30 Energy ・ 35 Skill Pts ・ Random Stat +5 |
Solid Showing (OP and Pre-OP) (Super Creek)
| Choice | Outcome |
|---|---|
| Choice 1 |
・ -20 Energy ・ 30 Skill Pts ・ Random Stat +3 |
| Choice 2 (Success) |
・ -10 Energy ・ 30 Skill Pts ・ Random Stat +3 |
| Choice 2 (Fail) |
・ -30 Energy ・ 30 Skill Pts ・ Random Stat +3 |
Victory! (G1) (Super Creek)
| Choice | Outcome |
|---|---|
| Choice 1 |
・ -15 Energy ・ 45 Skill Pts ・ Random Stat +10 |
| Choice 2 (Success) |
・ -5 Energy ・ 45 Skill Pts ・ Random Stat +10 |
| Choice 2 (Fail) |
・ -20 Energy ・ 45 Skill Pts ・ Random Stat +10 |
Victory! (G2) (Super Creek)
| Choice | Outcome |
|---|---|
| Choice 1 |
・ -15 Energy ・ 35 Skill Pts ・ Random Stat +8 |
| Choice 2 (Success) |
・ -5 Energy ・ 35 Skill Pts ・ Random Stat +8 |
| Choice 2 (Fail) |
・ -20 Energy ・ 35 Skill Pts ・ Random Stat +8 |
Victory! (G3) (Super Creek)
| Choice | Outcome |
|---|---|
| Choice 1 |
・ -15 Energy ・ 35 Skill Pts ・ Random Stat +8 |
| Choice 2 (Success) |
・ -5 Energy ・ 35 Skill Pts ・ Random Stat +8 |
| Choice 2 (Fail) |
・ -20 Energy ・ 35 Skill Pts ・ Random Stat +8 |
Victory! (OP and Pre-OP) (Super Creek)
| Choice | Outcome |
|---|---|
| Choice 1 |
・ -15 Energy ・ 30 Skill Pts ・ Random Stat +5 |
| Choice 2 (Success) |
・ -5 Energy ・ 30 Skill Pts ・ Random Stat +5 |
| Choice 2 (Fail) |
・ -20 Energy ・ 30 Skill Pts ・ Random Stat +5 |
Super Creek Career Goals
| Goal | Race/Goal |
|---|---|
| Run in Junior Make Debut | Junior Make Debut |
| Place top 3 in Sumire S. |
 Sumire Stakes Sumire Stakes
(Medium - 2200m) Classic Year Late Feb |
| Place top 3 in Kikuka Sho |
 Kikuka Sho Kikuka Sho
(Long - 3000m) Classic Year Late Oct |
| Place top 3 in Arima Kinen |
 Arima Kinen Arima Kinen
(Long - 2500m) Classic Year Late Dec |
| Place top 3 in Osaka Hai |
 Osaka Hai Osaka Hai
(Medium - 2000m) Senior Year Late Mar |
| Place top 3 in Tenno Sho (Spring) |
 Tenno Sho (Spring) Tenno Sho (Spring)
(Long - 3200m) Senior Year Late Apr |
| Place 1st in Tenno Sho (Autumn) |
 Tenno Sho (Autumn) Tenno Sho (Autumn)
(Medium - 2000m) Senior Year Late Oct |
| Place 1st in Arima Kinen |
Arima Kinen
(Long - 2500m) Senior Year Late Dec |
Super Creek Profile
Basic Information
 Super Creek Super Creek"I can spoil you as much as you'd like. Aww, there, there. ♪" | Voice Actress | Kana Yuuki |
|---|---|---|
| Height | 168cm / 5'6" | |
| Weight | Slight increase (a secret as to why) | |
| Birthday | May 27 | |
| Three Sizes | B 97 | W 61 | H 91 | |
| No matter how bad you were, this racer will forgive and comfort you before spoiling you rotten. Her tendency towards leniency sometimes extends to herself. She values the growth of others over even her own personal gains. She is rivals with both Oguri Cap and Tamamo Cross. | ||
Costumes
| Uniform | Racewear |
|---|---|
 |
 Murmuring Stream Murmuring Stream |
Umamusume: Pretty Derby Related Guides

Character Guides
| Height and Weight | Voice Actors | Three Sizes | List of Birthdays |
Characters (Trainees) by Rarity
| 3-Star Characters | 2-Star Characters | 1-Star Characters |
Current Umamusume Characters (Trainees)
 Grass Wonder (Healer)
 El Condor Pasa (Monk)
 Hishi Amazon (Azure Amazon)
 Seiun Sky (Reeling in the Big One)
 Air Groove (Quercus Civilis)
 Mayano Top Gun (Sunlight Bouquet)
 Narita Brian (Maverick)
 Smart Falcon (LOVE☆4EVER)
 Narita Taishin (Nevertheless)
 Curren Chan (Fille Éclair)
 Tokai Teio (Beyond the Horizon)
 Mejiro McQueen (End of the Skies)
 Biwa Hayahide (pf. Winning Equation...)
 Mihono Bourbon (MB-19890425)
 T.M. Opera O (O Sole Suo!)
 Rice Shower (Rosy Dreams)
 Symboli Rudolf (Emperor's Path)
 Mejiro McQueen (Frontline Elegance)
 Taiki Shuttle (Wild Frontier)
 Oguri Cap (Starlight Beat)
 Maruzensky (Formula R)
 Tokai Teio (Peak Joy)
 Silence Suzuka (Innocent Silence)
 Special Week (Special Dreamer)
 Mayano Top Gun (Scramble Zone)
 Air Groove (Empress Road)
 El Condor Pasa (El Numero 1)
 Grass Wonder (Stone-Piercing Blue)
 Daiwa Scarlet (Peak Blue)
 Vodka (Wild Top Gear)
 Gold Ship (Red Strife)
 King Halo (King of Emeralds)
 Nice Nature (Poinsettia Ribbon)
 Matikane Fukukitaru (Rising Fortune)
 Haru Urara (Bestest Prize)
 Sakura Bakushin O (Blossom in Learning)
 Winning Ticket (Get to Winning!)
 Agnes Tachyon (Tach-nology)
 Mejiro Ryan (Down the Line)
Comment
Good day! Thank you for using our guide and catching this! We have replaced "End Closer" with "Pace Chaser". We hope you continue using our guides!
Author

Super Creek (Murmuring Stream) Build Guide and Character Info
Rankings
- We could not find the message board you were looking for.
Gaming News
![2XKO Review [Closed Beta] | Riot Games Finally Steps Into The Ring](https://img.game8.co/4274934/6008986b07583b36b5b2b5b8072d0bed.png/show)


Popular Games

Genshin Impact Walkthrough & Guides Wiki
Hollow Knight: Silksong Walkthrough & Guides Wiki
Umamusume: Pretty Derby Walkthrough & Guides Wiki
Borderlands 4 Walkthrough & Guides Wiki
Wuthering Waves Walkthrough & Guides Wiki
Honkai: Star Rail Walkthrough & Guides Wiki
Pokemon TCG Pocket (PTCGP) Strategies & Guides Wiki
Pokemon Scarlet and Violet (SV) Walkthrough & Guides Wiki
Zenless Zone Zero Walkthrough & Guides Wiki
Clair Obscur: Expedition 33 Walkthrough & Guides Wiki


Recommended Games
Fire Emblem Heroes (FEH) Walkthrough & Guides Wiki
Yu-Gi-Oh! Master Duel Walkthrough & Guides Wiki
Persona 3 Reload Walkthrough & Guides Wiki
Once Human Walkthrough & Guides Wiki
Black Myth: Wukong Walkthrough & Guides Wiki
The Legend of Zelda: Tears of the Kingdom Walkthrough & Guides Wiki
Super Smash Bros. Ultimate Walkthrough & Guides Wiki
Monster Hunter World Walkthrough & Guides Wiki
Diablo 4: Vessel of Hatred Walkthrough & Guides Wiki
Elden Ring Shadow of the Erdtree Walkthrough & Guides Wiki


All rights reserved
© Cygames, Inc.
The copyrights of videos of games used in our content and other intellectual property rights belong to the provider of the game.
The contents we provide on this site were created personally by members of the Game8 editorial department.
We refuse the right to reuse or repost content taken without our permission such as data or images to other sites.
I don't get the card distribution here, if she wants as much Stamina as Speed where is the sense in taking 4x as many Speed cards as Stamina? That just guarantees a bunch of wasted turns trying to keep up on the latter